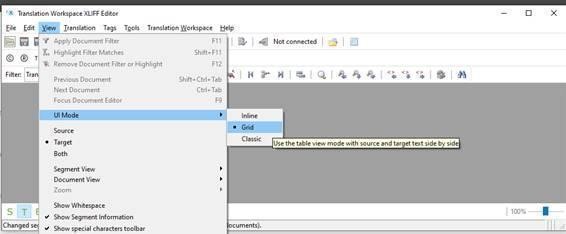
- After downloading and installing the tool, Run the XLIFF editor, click on the “View” menu, scroll to “UI Mode”, and select “Grid” (this will set the interface Grid mode, which I believe is easier to use)
- Open the translation file in the XLIFF Editor. (Go to File > Navigate to the required location [where the xlz files are] on PC and open). Note – do not touch the filenames or change them
- Start translating by clicking on the first translatable segment. (Clicking the green arrow on the toolbars will move you among the translatable segments). Sign in to Translation Workspace on the popup that comes up using your given credentials, which will come in the format below:
- Username:
- Password:
- Tenancy:
- Server Address: translate.translationworkspace.com
- Proxy Address: Leave blank
- Select the TM (which will be issued to you), then select the source language pair and target language.
Note: If you do not have any credentials and TM, click the “Cancel” button on the popup and proceed to translate offline.
- If a prompt comes up for an upgrade to the XLIFF editor, perform the upgrade and allow the reinstall.
- You might notice TM suggestions as you translate, and there will be a glossary on the right pane that you can search and refer to. Ensure to keep consistency with the TM and suggestions.
- Proceed with translating the file from the beginning – click on the first segment and enter the translation.
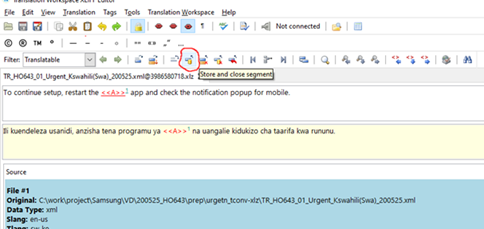
- After entering the translation, you must “store and close” the segment before moving on to the next. Do this by clicking the appropriate icon (circled red below)
- Translate the next segment, store and close again, and move on through the document
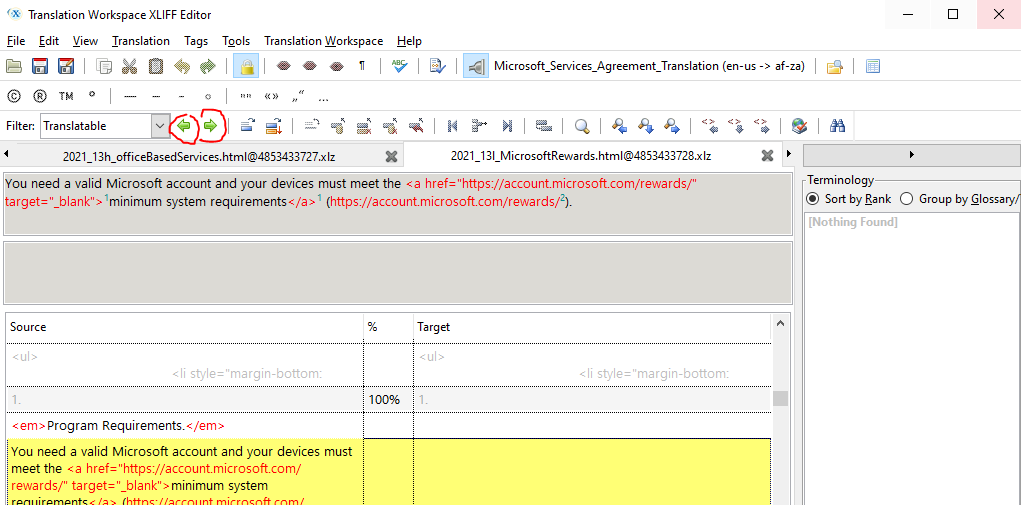
- To move between segments, you can use the arrow keys beside the filter (circled red below). These will let you cycle through the translatable segments in the file
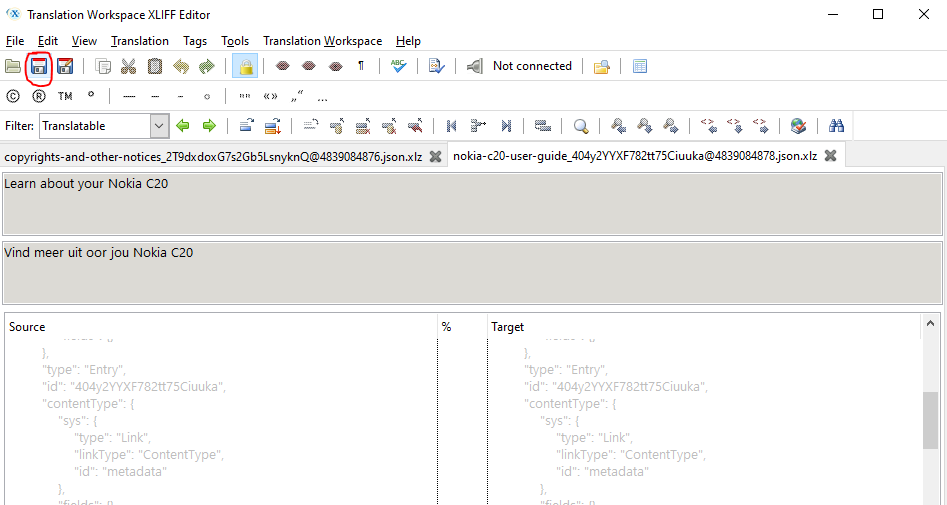
- When all translatable segments in the file have been translated, save the file using the “Save current file” icon (circled red in image below). This saves the file on same location it is opened from.
- You might notice tags while translating. Read about what they mean and how to handle tags (insert them in translation, delete if required) here: How To Handle Tags.
- After translating a file
- Run a QA check by pressing the F8 key on your keyboard and fix all issues
- Ensure there is no untranslated segment by using the ” Untranslated ” filter. There should be no untranslated segment left without exception. If a segment only contains tags, please copy the source to target and confirm the segment
- Close the tab and move on to the next
- When you translate all the xlz files, go back to their location on the PC (e.g., My Documents or Desktop), zip them, and send them back.